How to Pick & Clean a Blue Crab (From a Marylander)
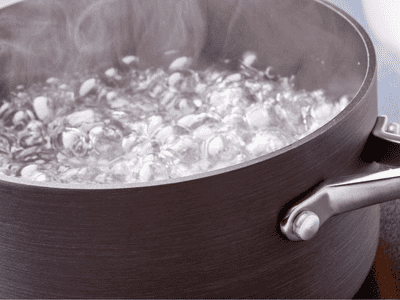
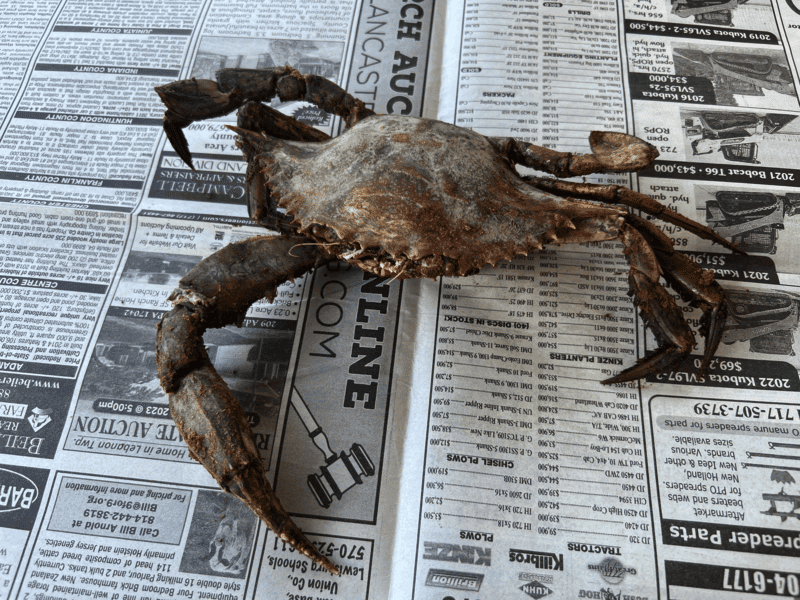
Back in September, I went crabbing on my kayak with one goal: catch a crab to teach my readers how to pick a blue crab. I was out on the water near Oxford, MD for just over an hour and came back with a dozen blue crabs. Take a look after I steamed them:
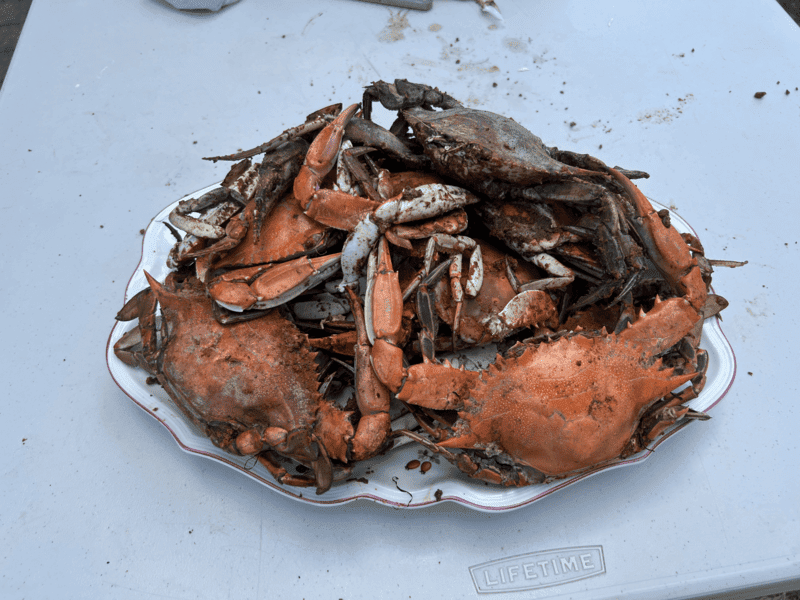
Not a bad day! Now I get to show you how to pick them with the pictures and videos I took. Let’s start with what you’ll need, followed by a few steps to get to the meat of your crab. I’ll include little tips I’ve learned from people much better at picking crabs than me as they come in handy.
I put together a video that works as a summary, video version of this article. Feel free to check it out for my commentary on how to pick a crab. Otherwise, let’s get started!
1) Prepare your table for crab picking.
To get things started, you need to prepare your crab picking space. It’s best to pick your crabs outdoors at a table. Picking crabs inside at your dinner table works, but it’ll make your whole house smell like crabs. Plus, it’s easier to clean up the mess afterwards. If you have any carpet under your table, nows your chance to move it. You want a spot you don’t mind getting messy!
Now that you have a spot picked, it’s time to set it up. You will need the following:
Newspaper, parchment paper, or any disposable covering for your table.
Crab shells pile up in this process, and having paper over your table makes clean up so much easier. All you have to do is roll up the paper with the shells on top, while keeping the mess in the roll of paper. Then, throw it out!
A Hand-Sized Bowl of Water.
Later in this article, you’ll see my hands get very messy with crab guts. To avoid getting up from the table every so often to rinse your hands or going through a whole roll of paper towels, a great tip is to have a bowl of water to dip your hands in. I recommend one bowl per three persons picking crabs. They will get nasty fast, so changing the water every so often is recommended.
A Crab Mallet, Cracker, or Butter knife.
These are your tool options when cracking open crab legs. Which one you use is up to you.
The hardest one to use is a butter knife, but it’s not too difficult to learn. I’ll show you the technique later in this article, but it doesn’t crack as efficiently as a wooden mallet or crab cracker. Plus, you have to bang the knife on the crab leg on the table, which can easily dent a wooden table.
You can get cheap wooden mallets at the grocery store or this cheap listing on Amazon. I recommend these if you are having a lot of people over, since it adds to the crab picking experience. However, it also raises the issue of denting your wooden table.
If you don’t want to potentially dent your table, use this crab cracker with a fulcrum joint, similar to a nut cracker. With this, you squeeze a crab leg in-between the joint. It’ll crack easily with the mechanically advantage of the fulcrum, guaranteeing a table-dent-free crabbing experience!
2: Grab your crab of choice.
With a clear space to work, and a designated spot for your discard pile, you can get started by choosing your crab! To state the obvious, the larger crab will usually have more meat. A cool trick to know how dense the crab’s meat will be is to look at its underbelly.
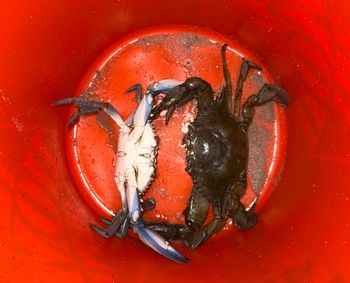
A yellower, dirtier looking underbelly indicates that the crab hasn’t molted in a while. This means it has more meat under its shell compared to a crab that just molted. They’re known as “whiteys” by commercial crabbers. See the infographic I made below to see the difference:
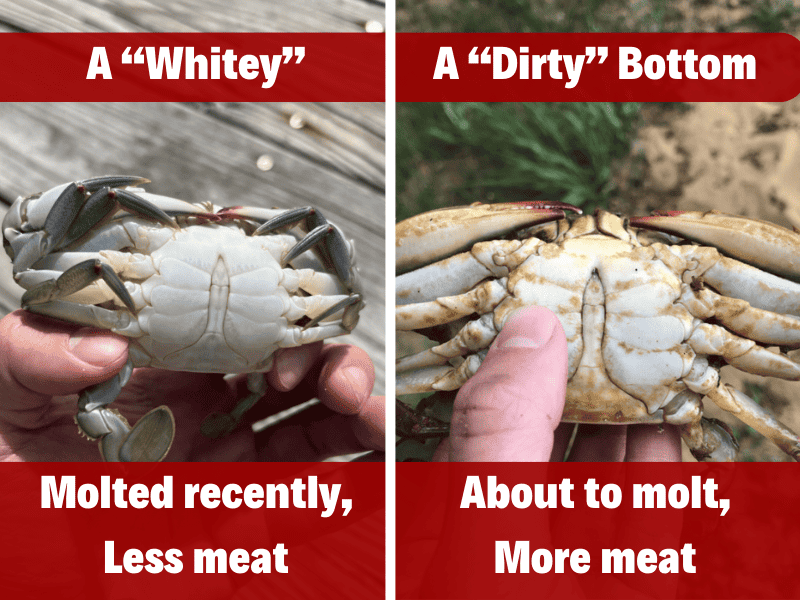
These are a side-by-side of two crabs I caught. The one on the left was at Holt’s Landing State Park, DE in early May. Crabs were just getting into season, which means most of the crabs were small and had recently molted. Compare that to the crab on the right I caught on the Sassafras River, MD. It was much later in the season. The crab hadn’t molted yet, which left it with a much dirtier shell. This crab has more meat than the “whitey” on the left.
I wrote a whole article to help you differentiate a crab full of meat and a “hollow” crab in my article: Here’s How to Tell Whether a Crab is Hollow or Full of Meat. If you’re interested, take a second to look at that.
Long story short, pick a big crab with a dirtier underbelly for the most meat.
Another thing to be aware of is the look and smell of the crab. If the crab smells off, like rotting meat or different from the other crabs, toss it. Furthermore, if the meat in the crab you’re picking (which I’ll show you how to get to as the article goes on) isn’t the normal white crab meat color or also smells/tastes off, toss the crab. This crab may have died before getting cooked, which deems it unsafe to eat. Better safe than sorry!
3) Flip a crab on its back and remove the bottom apron.

Flip your crab over and identify the apron. For male crabs, it’s the thin, triangle-shaped part of the crab’s underbelly. It looks similar to the Washington Monument in DC. For female crabs, it’s a rounder, capitol-building looking part of the crab. If you’re having trouble finding it, read my article: Male vs Female Blue Crab (What’s the difference?).
Once you find the apron, separate it from the crab’s shell with a utensil or your finger nail. All you need to do is separeate the two. Pull it down without removing it from the crab. Readjust your fingers to place your thumb down at the base of the apron where it connects to the crab shell. Ping it with your thumb and pointer finger and pry down. The apron should cleanly snap off.
4) Remove the top shell by prying between it and the back legs.
Having removed the apron, we can now pry off the crab’s top shell. This will reveal the crab’s innards, including its guts, gills, and mouth. All of these things are not edible and should be removed, which is why I always remove these before I even think about the crab meat.
Turn the crab so it’s facing away from you and you are looking at its two back fins. You know they are fins because they look different than the crab’s pointy legs. Place one thumb on one of the back fins, and another under the crab’s top shell. The shell should easily pry off in this position.
See the video above for a demonstration.
Fun fact, there are tiny bits of meat in the crab’s two points on its carapace, also known as its top shell. If you’re extra confident, take a second to snap off these points to find the meat inside!
– Taylor Whiteman, Crabbinghub Owner
Now that we have the shell off, we need to get rid of the inedible parts of the crab. See this image below for the items we’re removing:
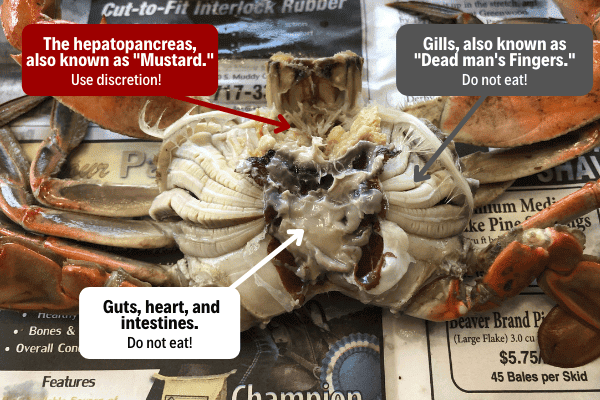
Image source: Parts of a Blue Crab You Shouldn’t Eat! (With Images) via CrabbingHub.
We’re getting rid of the guts, heart, and intestines as well as the crab’s gills. These are not crab meat, taste bad, and can even get you sick. The next few steps will be me showing you how to remove all the inedible parts of your crab, leaving just the crab meat and shell.
5) Use your thumb to pry off the crab’s mouth.
Before we scrape out the inedible parts, I recommend getting rid of the mouth and any parts of the carapace that stayed attached to the crab’s body. It’s much easier to clean out the crab with these out of the way.
The face of the crab is opposite of where you pried off the crab’s shell. Place your thumb square in the middle of the crab, and pull down on the face. It should cleanly snap off, but will probably require a bit more swipes and snaps of shell to fully remove this part.
See the video above for a demonstration.
6) Use a utensil or your finger to scrape off the gills.
The crab’s gills are notoriously inedible. Some people call them dead man’s fingers or crab lungs. Regardless of what you call them, they need to go. All you need to do is use your fingers or a utensil to scrape away at the lungs and they’ll fall right off. Throw them in your discard pile.
See the video above for a demonstration.
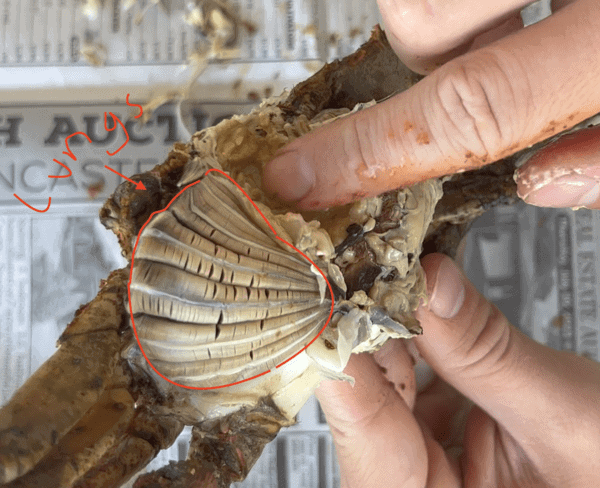
The gills are these long, sandy-colored triangle-shaped parts on both sides of the crab under its shell. They are outlined in the image above in red. Remove these before eating your crab.
7) Use your finger to scrape out the crab’s guts.
The last step here is to scrape out the crab’s guts. They’re found in the cavity between where the gills used to be. We removed the crab’s mouth in step 5, which will make this part a breeze. You your thumb or the end of a butter knife to scrape in the cavity towards where the mouth of the crab used to be. The guts will scrape right out.
After scraping them, you have the option of holding your crab under running water to wash out any non-crab-meat parts that got left behind in the cleaning process. This gives some peace of mind, but everyone seems to have an opinion on the matter.
Some say that it removes the inedible parts of the crab, others say it takes away all the flavoring and the crab mustard. The “mustard” is not the literal condiment, but the yellow stuff found under the crab’s shell. I come from a family of crab eaters that love the mustard, which means washing a crab in my house is a crime. All jokes aside, what you do with your crab is up to you. Do what makes you comfortable.
If you want to learn more about the crab’s mustard, such as if it’s safe to eat, what it is, and so forth, read my article: What’s the Yellow Stuff inside a Crab?
8) Split the Crab’s Body in Half
After step 7, you can go a few different ways with picking a crab. Some people pull off the claws and split them separately from the body, but we at CrabbingHub know better. I’m gonna show you a trick to get the crab’s body meat to come cleanly off with each leg, which you can dip in butter, old bay, or both!
We start by splitting the crab’s body in half.
As the video above shows, place a thumb on each side of the crab’s body where the lungs used to be. Push with your thumbs and pull the crab’s bottom towards you. The crab should cleanly split down the middle without the apron and top shell holding it together.
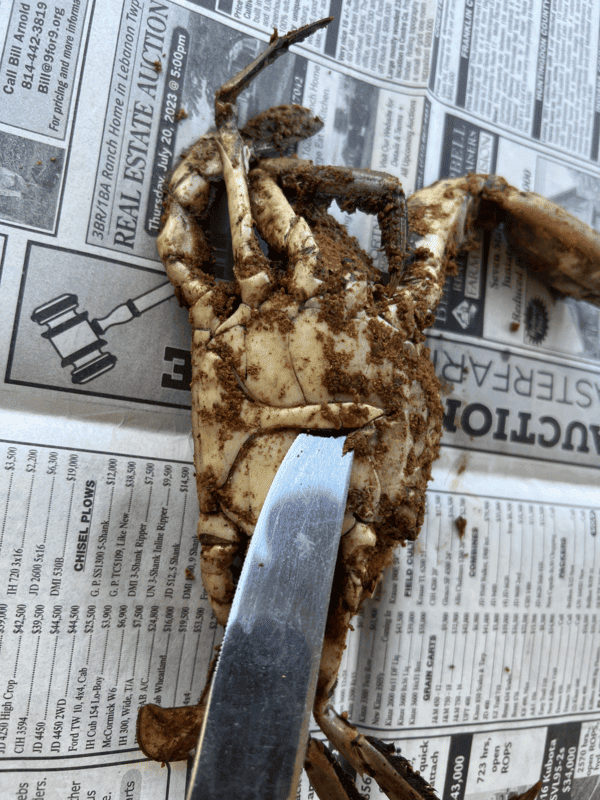
This method is so great because it makes the usually brutal task of picking a crab’s body very straightforward. As we can see in the image below, it separate’s the crab’s meat into neat little cavities, which connect to the crab’s legs. This makes sense as these were the muscles that used to allow the crab’s to crawl around.
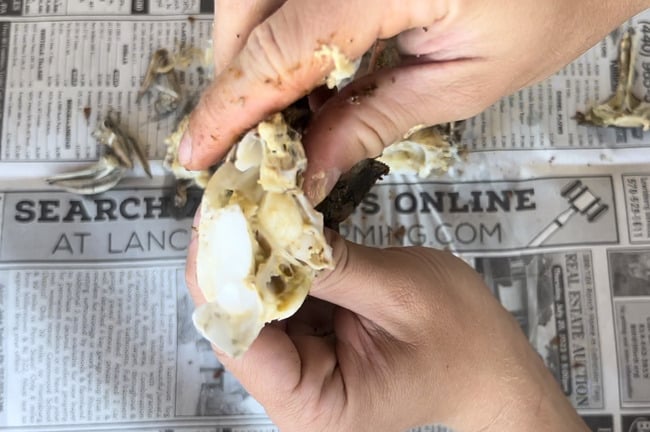
These few cavities are going to guide how we pick the crab, in the next step.
9) Separate each cavity and remove the shell around the meat.
Here’s the Crabbing Hub secret crab picking method I keep close to my chest. I figured this out after spending hours sitting and tediously picking the meat out of a crab’s body. I realized it’s so much easier to pull away the crab’s meat in its body with the leg. See the video below for an example:
To narrate, place a thumb in each cavity in the body and your fingers around the corresponding leg, then pull it away from the crab’s body. After a few practice crabs, you’ll be able to pull away the chunk of meat in the crab’s body that’s attached to each leg. This is perfect for dipping in some butter, old bay, or both!
It’s much easier to do this then tediously pick the crab’s meat from the cavities in its body. Repeat this step for each leg in the crab’s body, and you’ll get the majority of the meat from the crab’s body in a quarter of the time. Plus, you’ll look very experienced compared to the other crab pickers at the table.
10) For the claw, separate, crack, and pry open each portion of the arm.
Picking a crab’s leg is a repetitive, yet satisfying process. You separate each leg at its joint, use a mallet or butter knife to crack each section in the center, and slowly pry it apart to reveal the meat inside. The claw and leg meat tastes sweeter and a brighter color than the body’s meat, which is a more savory meat.
Take a look at this video for a demonstration.
With some crabs, you can wiggle the meat out each crab’s leg section. For this crab, I had to stick my butter knife in the crab to push out the meat. It depends on the crab, and skill. This isn’t my proudest performance, but it’ll do for this article!
The trick to split each section of the leg is to place the sharp end of the butter knife on the white bottom of the leg. Then, use the heavy end of another butter knife to hammer it down with a few swings. You can also hammer it with a wooden crab mallet.
If you use just a crab mallet, you’ll smush the crab’s leg. This works, but you’ll have to pick out the tiny shell fragments like a poorly cracked egg. Also, always split the crab leg by the white underside. The top, red part, is much more durable and hard to split.
For the claw section, place the pinchers on their side. Place the butter knife in the dead center between the joint and tips of the claw, and use the sharp end mallet hammer approach to get your knife a quarter way through the crab. Then, take the knife away and use two hands to pry the claw open. The meat will separate from the claw easily. Remember there will be cartilage in the claw, so avoid eating that!
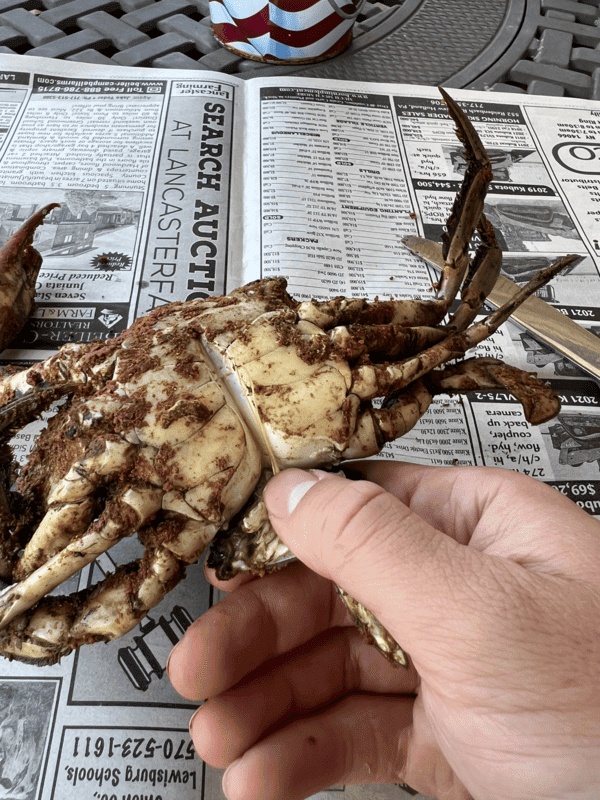
I caught this poor crab and he only had one claw! So, I’ll only show how to pick one. He must have lost it in a tussle with another crab. See this selfie I took with him as proof:

11) Pick the remaining legs and fin with your mallet and knife.
The last step is to get through each crab’s leg and fins. This part has the smallest amount of meat, but tastes sweet like the claws. So, it’s worth it. Some people avoid these entirely! If you have the patience, advertise it and the impatient people at the picking table will gladly give you their crab legs. For each leg, repeat the process you used with the claw’s appendages. You should be able to split them in half with your hands and not the mallet.
For the knuckle, you’ll get the most meat from pulling it from the crab’s body like you did with the claw. Plus, you can squeeze out some meat from the knuckle before the fin. See the video below of how I did that:
With that, you have successfully picked a blue crab! This is how I pick crab’s at every crab feast, a method I’ve been perfecting since I was a kid. If you have any suggestions for how I can improve this and eat a crab even faster, please leave a comment and I’ll try it out! Thanks for reading.