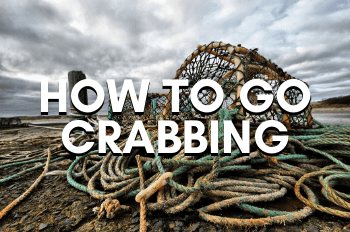
A Beginner’s Guide to Crabbing off a Pier (Step-by-step)
The easiest way for someone who has never gone crabbing before to get into the sport is to go crabbing from a pier. That pier could be any public pier that allows crabbing, or a private pier you have the privilege to use. Let’s look into what to bring when to go, and how to go crabbing from a pier.
What to Bring
Unless you’re using a crab pot, you’re going to be spending a long time on a pier. You will need to come prepared for any challenge that awaits you on your crabbing trip.
Firstly, bring the essentials. Plenty of water bottles, lunch, and sunscreen make for a great day on the pier. A great book and a sun hat will help the time. Not all public piers have seating, so be sure to bring a comfy chair to rest your feet.
Now we need supplies to go crabbing. The top traps for crabbing off a pier are hand lines, ring nets, box traps, and star traps. I’ll get into detail on how and when to use these crabbing techniques later in the post. You can buy these traps on Amazon or any outdoor supply store that’s near the water with crabs in it.
To help make the experience easier for any first-time crabber, I recommend bringing tongs and a cooler. Tongs make holding a crab a less threatening experience. Crabs are slippery and slimy, so I would buy tongs with rubber ends. If you’re brave enough to try and hold a crab, check out our post: How to Hold a Crab – Never Get Pinched Again!
A cooler will help keep the crabs you catch fresh and alive. Depending on the side of the cooler, a small ice pack wrapped in a damp towel will keep your crabs fresh and alive. When you wrap the ice in a towel, hold it to your cheek. You want to feel a faint coolness, nothing too harsh or not cold enough.
As long as crabs are kept cool and moist, they’ll last up to 24 hours in a cooler. Be sure to throw away any dead crabs.
Bait
Everyone likes to argue which bait is best to bring on a crabbing trip. The most popular bait for recreational crabbers is chicken necks. They’re very cheap and easy to tie onto any trap because of their cylinder shape. They’re very tough and would take a long time for a crab to eat.
However, people debate it’s not the best bait because it’s not what the crabs are used to eating. I doubt chickens die in the ocean very often. I have six free-range hens and they run from anything remotely threatening. I doubt they would step foot near a crashing wave.
I prefer to use freshly caught fish for my bait. I’ll take my fishing pole to catch a couple fish, which I’ll then fillet at the pier and throw in my trap.
There’s no solid proof that one type of bait outperforms the other. If it were my first time going crabbing, I would stop at the grocery store and pick up chicken for simplicity’s sake.
Be sure to check out my guide on all things crab bait.
Crabbing Regulations
To conserve the crab population in every state, it’s important that everyone follows their state’s rules and regulations for crabbing.
To find your state’s regulations, you can check out my site’s directory by clicking here, or find it yourself on Google Search. Type into your search engine “(state) crabbing regulations. Keep an eye out for your state’s DNR (department of natural resources) website for the most accurate and up-to-date information.
Most, if not all, states require a saltwater fishing license to operate more than 2-3 hand lines or ring nets. If you’re fishing from a public pier and pay for a fishing pass, you should be allowed to go crabbing without a license. Always be sure to ask the pier staff for clarification, just in case.
Best time
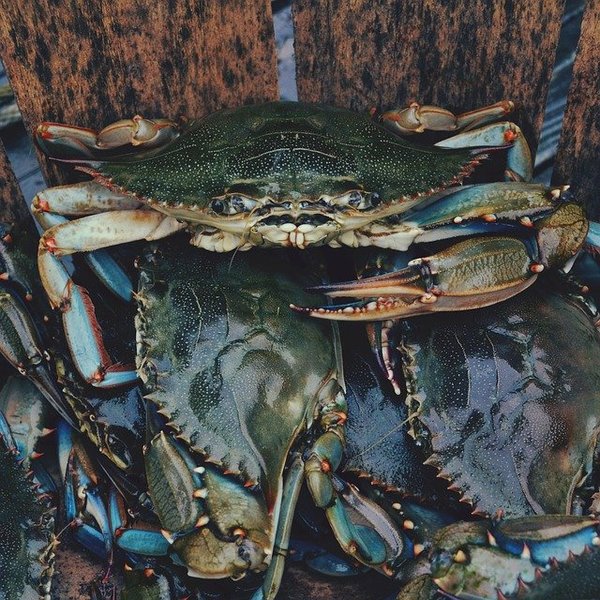
The best time to go crabbing on a pier for blue crabs is 1-2 hours before high tide and all the way through 1-2 hours after high tide. This is known as slack tide where the water is moving constantly.
Blue crabs are lazy creatures. They like to let the water do the moving for them. They have little fins on their backs, which help them glide through the currents looking for their next meal. This makes slack tide the best time, because of how strong the currents are which carry your blue crabs.
For Dungeness crabs, the best time to go crabbing is during an incoming tide. This is right after low tide, all the way to right after high tide. Crabs like searching for food along the shoreline during incoming tide because they don’t have to fight the currents pushing them back into deeper waters.
Be sure to plan ahead. Check out https://www.tide-forecast.com/ for accurate tide charts for wherever you plan to go crabbing.
Crabbing Techniques
Now that you know what to bring and a few crabbing regulations for your state, you need to know how to catch the crabs. Out of all the ways recreational crabbers catch blue and Dungeness crabs, I find these four the best techniques when crabbing off a pier.
Hand Lines
You can’t find a more basic technique for going crabbing than a hand line. Simply take some strick and tie a piece of bait to the end. Wallah! You have an unstoppable crab-catching machine. This works best on piers that are closer to the water.
This will work much better with blue crabs instead of Dungeness crabs, which are a bit heavier and sometimes too much for a simple handline.
It’s perfect for any newbie crabber with its low cost and simple mechanics. The process is simple:
- Tie some bait on the end of a 10-20ft string. Chicken or fish will do just fine.
- If the current is a little strong or the water’s rough, add weight to your line.
- Tie one end of your line to somewhere on the dock. The posts coming out of the water would do just fine. I recommend setting up four or six lines so that you have a better chance of catching a crab.
- Now it’s time to pull out a good book, your fishing rod, or anything to keep you busy. However, nothing too distracting because you need to keep an eye on the lines. If one string starts to abnormally move in the water or become taught, there’s a crab on your line.
- This is where the skill comes into play. You need to slowly pull the string towards the pier. When I say slowly, I mean very slowly. Your goal is to make sure the crab doesn’t notice it’s slowly heading towards the surface.
- This part is easiest with a friend. While you pull the crab towards you, he or she will be in charge of the dip net. A dip net is basically a small circular net on the end of a stick. Once the crab is near the surface, have your friend try to scoop up the crab with the net. It sounds simple, but it’s easier said than done. My tip is to scoop from under the crab, this gives it less time to swim away.
Sure the process is simple, but what about the handline? It sounds like a bunch of little knots which can get confusing. I try to kid myself, but I’m definitely not a knot master. So I, like most people, have to settle for a pre-made handline.
At most outdoor supply stores such as Bass Pro Shops. Even Walmart will have them if you’re near crab-filled water. I buy them from Amazon where they sell small contraptions called throw lines. They’re very inexpensive and I use them when I go crabbing from piers. Click here to check them out on Amazon (Affiliate Link). They work as a handline but already have a built-in small clip to attach your bait to as well as a small weight to keep your line in place.
If you want to save the trouble of setting up your hand line, I recommend buying some, especially when they’re dirt cheap.
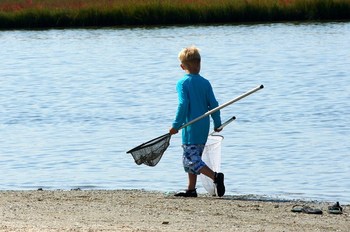
The next method is a bit easier for less patient people and perfect for children.
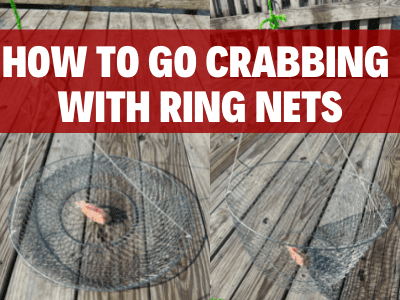
Ring Nets
Also known as hoop or even drop net, depending on who you ask, the ring net is one of the easiest ways to catch any type of crabs. The concept is very similar to the hand line, but a much simpler task to perform.
Ring Nets are a small circular net with a harness on top. They use the same mechanics as hand lines, wait until the crab is in your trap then pull it to the surface.
Similar to the handline guide, here’s a quick 5 steps on how to use ring nets:
- Make sure you have the right quality ring net. Dungeness crabs are larger and heavier, so if you’re on the pacific coast you’ll need a heavy-duty net. On the east coast, you can get away with the junky $7 ring nets.
- Add bait to your net. Attach it to the center of the inside of your net with anything that will keep it secure. A zip tie or a few clever knots will do just fine.
- Your ring net should be secured to the pier to avoid losing your net in the water. That’s happened to me a few times and it’s the worst feeling. I never should have gone with the $30 dollar net.
- Now simply throw your net in the water. If it moves around from the current, pull it back up and weigh it down with some rocks.
- Again, it’s time to wait. There’s no way to know if a crab is in your net (like before). So, this time you need to wait 5-15 minutes before you check if a crab’s in your net. The trick is to make sure you have enough bait to keep a crab happy for 30 minutes or so. That will give you a better chance of pulling up a crab.
A great part about this method is that you don’t need someone to man the dip net. It’s easy to handle several ring nets at a time by yourself, and a great way to catch some crabs.
Ring nets are a bit more expensive than hand lines at around $7 to $30 each. You’ll be crabbing with at least 4, which can get pricey including bait and other supplies.
However, the benefits beat the price tag. You’ll be sure to catch more crabs with ring nets instead of using a handline. It’s much easier to catch a crabs
Star Traps & Box Traps
The star trap and box trap work exactly like a ring net, but instead of a net, they use a cage. I paired these two together because they work exactly the same, but are differently shaped.
A star trap will lay flat on the riverbed in a 4-pointed compass shape. It’ll stay like that until a crab scurries up to the bait attached to the center. Just like the ring net, you wait until you think a crab is eating your bait, then you pull it up. The trap will then fold into a pyramid shape, trapping the crab inside.
A box trap, on the other hand, will be a box with no walls. There’s a small outline of a box shape, and a harness that leads to the rope you’re holding from the pier. When you pull on the rope, the walls will fold up from the bottom to form a box. If you smoothly pull the trap to the surface, you should catch two, if not three crabs at a time!
Here are 5 steps to using star traps & box traps.
- Make sure you have the right type of trap. If you’re crabbing for Dungeness instead of blue crab, you will need a trap with larger-sized mesh.
- Attach bait to your traps. This should be in the very center of the trap that will be completely enclosed when the walls fold up. A zip tie should do a great job holding your bait down.
- Make sure your rope is secured to the harness, then tie it to the pier. You don’t want to lose your trap in the water. Make sure the water is at least 3 feet deep.
- Throw your trap in the water and wait. Make sure the trap is far enough away from the pier to not get caught on anything. Like the ring net, you’ll have to wait 5-15 minutes before you check on your traps. Make sure there’s enough bait in your traps to last that long.
- Now it’s time to pull your trap. As you pull the rope, you start off with a strong pull, but nothing that would jerk the rope. You need to close the trap very quickly before the crab realizes what’s happening. I would practice on land before throwing it in the water. Be sure to keep constant tension on the line as you pull so that the doors stay shut.
These crabs come at around $7-$15 dollars each for the cheaper, lower-quality traps. High-quality traps can run you up to $20-$30 each.
After comparing a ring net, pyramid trap, and box trap, I found that the Foxy-Mate is the best one you can buy. They’re inexpensive, long-lasting, and work every time. Pyramid traps and ring nets have trouble closing, which means lost crabs. I recommend you read my review of the Foxymate before purchasing it.
Crab Pot
Last, but definitely not least, is the crab pot. People down south call it just a plain old crab trap, and people in and north of the Chesapeake Bay call it a crab pot. It’s essentially a 6 sided cube with holes on each side for crabs to come in, but not be able to escape. It’s the only passive way to catch crabs on the list. The concept is simple: set it and forget it.
I wrote this last because it works best on private piers or any pier that you feel comfortable leaving overnight. There are too many people out there who might want to steal your crab dinner or even your trap!
Using a crab pot is as easy as 1, 2, 3.
- Throw some bait in your trap in or near the center. Most crab pots have a bait box for you to stuff your bait in.
- Tie a line to your trap and secure the other end to a post alongside your pier. Once its secure throw your pot out into the water. Make sure it’s at least 4 feet deep.
- After 8-24 hours, pull your trap and see what you got. Any crabs large enough to keep can be brought home and thrown in the steamer.
While these traps take the least work, they’re the most expensive. For blue crabs, you’ll find the cheapest traps at $30-$50. For Dungeness crabs, traps can go for $100+. However, you can find deals for used crab traps on Craigslist or eBay, just make sure the trap is in good shape.