7 Tips & Tricks Every Recreational Crabber Should Know
Everyone has their first time going crabbing. To ensure it’s a good one, I found 7 tips and tricks every recreational crabber should know. They’ll make your trip much more enjoyable, and definitely up your odds at catching crabs.
Find your favorite bait
Every single experienced crabber has his or her own go-to bait. Next time you go crabbing, a great way to make small talk with competing fishermen is to ask them what’s their favorite bait.
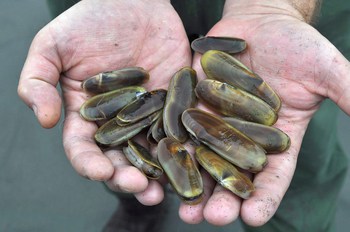
You’ll get a wave of answers. Some like the classic chicken neck, others prefer certain types of fish. You’ll also hear mixed answers such as razor clams, squid, and even cat food.
If you were to ask me the question, I would say my favorite bait is freshly caught fish from the same body of water where you’re crabbing. This is what the crabs would regularly eat, and hasn’t failed me yet. I also enjoy fishing, which gives me an excuse to bring my fishing rod whenever I go crabbing.
The best way to find your favorite bait is to test out different baits. I recommend bringing close to a dozen crab rings on a dock, each with its own bait. It would be a cool experiment to try out, and rather interesting to see which bait the crabs prefer.
You can find all the bait you need at any bait & tackle shop, or your local grocery store. Crabs like greasy, meaty foods such as chicken breasts or fish fillets. You can find chicken necks for very cheap, which, in my opinion, work best for any first-time crabber.
Don’t go breaking the bank, these crabs will eat just about anything. Be sure to check out my article on crab bait for more information.
Use More line than you need
Fun fact: when high tide comes around, water levels can rise up to 40 feet, depending on where you are in the world. On the American east coast, water levels at around 4-5 ft.
When laying your crab pots, you need to account for these sudden changes in water levels. At low tide, it’s recommended that you leave 6-10ft slack between the surface of the water and your buoy.
A great rule of thumb is to leave one third of the water’s depth as additional line. This will keep your buoy visible during high tide, and prevent any strong currents from dragging your trap in the water.
Make your Buoy More Noticable
Something crabbers often miss is making their buoy noticeable. It’s easy to lose your buoy in rough weather and open wates. If the current gets a hold of your crab trap and moves it from its original spot, you need to count on your buoy to be visible enough to find the trap.
First things first, invest in a buoy. People use milk cartons and other makeshift buoys which get lost all the time. A real buoy may set you back $10-$!5, but can save you another $80 for a new crab pot.
You can go a step further and buy a buoy with a built-in flag for even more visibility.
Some states actually require that buoys are a certain size to prevent crab traps from being lost. For example, according to South Carolina’s DNR website crabbing buoys must be at least 10” in length (Source). Be sure to check with your state’s DNR website for any rules and regulations regarding buoys.
It’s also a good idea to paint your buoy bright, visible colors. Red, yellow, and orange are the most noticeable in open waters.
Some states require your buoys to be painted certain colors to ensure visibility. For example, in South Carolina buoys are required to be painted yellow (Source), and Delaware requires crab traps to be painted all-white (Source).
While you’re at it, make sure your full name, number, and address is clearly printed on the buoy. This is a law in every coastal state, and can work out for you if someone finds your lost trap.
Lastly, you’re not limited to a single buoy. Two, buoys can make a difference in buoyancy as well as its ability to stand out.
Map Out Your Crabbing Spots
It’s very important to map out where you’re setting your crab traps. If a strong current grabs hold of your crab trap, it can easily push it into deeper waters and make the trap hard to find.
To avoid losing your crab trap, be sure to use depth finders and contour maps to find the best spots to set your traps. Aim for relatively shallow areas with little to no pits or drop offs, if you can help it. Also, an ideal spot would also have little to no boat traffic.
A contour map is just a fancy, easier-to-spell word for a topographic map. Every good crabber has an up-to-date map of the area where they’re crabbing. Be sure to stay far away from any sudden drop offs or pits in the water, in relatively shallow and sandy areas.
A great resource for topographic maps is https://www.topozone.com/. It’s a free online resource that shows the water depth of every waterway in the US. My favorite part about it is that it’s accessible from your smartphone, just as long that you have internet connection. A great way to get around that is to take a screenshot, or several screenshots, of where you plan to go crabbing.
I also recommend using a depth finder to help map out the best possible crabbing spots. You can find them at any outdoor supply store such as Cabelas or Bass Pro Shop, or any bait and tackle shop.
The depth finder sends a flash sonar pulse (sound waves) to the riverbottom, which bounce back and determines the depth of the water. It’s a great way to check for any random drop offs or pits that the maps don’t account for. The current is constantly moving the sand and mud around the bottom of the river, which doesn’t make topographic maps very accurate in the long run.
Weigh Your Rope
Especially when crabbing in popular, busy waterways it’s important to weigh your rope. Normal rope sits on the surface of the water, just waiting to get caught in a boat propeller.
Weighing your rope may save you an angry phone call and a bill for a new propeller, and make your crabbing trip much easier. It’s easier to get close to your buoy without the fear of getting caught in the rope as it likes to hide below the surface.
Tying weight on your line every 8-12 feet can cause a big difference for your trap’s line. You can easily use a dropper loop knot to create small loops on your line to tie small weights (nothing over 3 lbs). If you don’t know the dropper loop, here’s quick how-to by AnimatedKnots.com.
Small weights every 8 feet or so can be a little annoying to keep track of. A simpler way is to buy lead rope. It’s designed specifically for crab traps to sink to the bottom to avoid getting caught on passing boats or debris. It’s a bit more expensive than tying makeshift weights on your line, but well worth the effort.
Out of all the weighted rope on Amazon, this has to be the best because of how easy it is to cut and light enough to not see a difference when pulling your traps from the water. For https://www.amazon.com/dp/B00SMGVUOY/ref=cm_sw_em_r_mt_dp_U_K-6wCbB934H7Z
Try Escape Rings
For all you crabbers who use crab pots, escape rings and escape coords in your crab traps isn’t just the humane thing to do, it’s the law.
For example, New Jersey’s Recreational Crab Pot Regulations states that “(all) crab pots must be constructed to include a biodegradable panel to provide a means of escape for marine organisms.” Be sure to check with your state’s department of natural resources for their crab pot regulations.
Scientists from the William & Mary’s Virginia Institute of Marine Science did a study in 2016 did a study and found some shocking statistics on the number of lost crab pots in the Chesapeake Bay and its tributaries.
They found that derelict traps (lost traps) became one of the biggest killers for the bay’s crab population. Over 3.3 million blue crabs were estimated to have died in these death traps from 2009 to 2012.
Firstly, it’s recommended that you use cotton escape coords for your crab pots. Simple tie a few inches of biodegradable cotton cordage to whatever line keeps the door of your crab pot closed. I recommend using an Albright Knot for this task. The knot works best with two different sizes of rope. This will make the crab pot open after being submerged in the water overtime, freeing any crabs trapped inside.
Another safety measure is adding an escape ring if your crab trap doesn’t have one already. It’s not only handy for letting the little crabs that get caught in your traps escape, but can also serve as a way to save crab lives if the trap is ever lost. Simply remove the ring from the trap, and reconnect it with the same biodegradable rope mentioned in the escape coords. It still serves its function as a escape ring for smaller crabs, but also saves the larger ones if necessary.
The less crabs that die in lost traps, the more crabs live in our waters and get put on the dinner table. Do yourself, and your community a favor and implement these modifications to your crab traps.
Always Bring a Crab Gauge
No one benefits when you catch and keep smaller crabs. They have less meat, and you miss out on the opportunity to catch a larger, tastier crab later in time. All coastal states regulate the sizes of crabs that can be caught, ranging from 4-5” for blue crabs on the east coast and 5 3/4 “ to 6 ¼” for dungeness crabs on the west coast.
When packing for your crabbing trip, rulers can be a little bulky and easy to lose while on a boat or dock. I recommend buying a crab gauge for the most convenient and way to accurately measure crabs.
Crab gauges can most likely be found on Amazon, Ebay, or wherever you buy your crabbing supplies. Make sure that you’re buying a gauge that’s built for and up to date with your state’s current crab size limit. They go for under $10, and can connect to a keychain or belt. I recommend attaching a crab gauge to a keychain, then the keychain to a carabiner for convenience.
To measure a crab, line the gauge with the two longest tips, or spikes, on the crab’s carapace. If the crab is larger than your state’s current size limit, you can keep the crab. Because the top shells of a crab are rounded, it’s much easier, and more accurate, to use a gauge rather than a ruler or tape measure.
Bee Wise Outdoors did a great job explaining how to measure crabs with a crab gauge. Be sure to check out his video:

